*This post contains affiliate links for products that I have used, loved, and want to share with you. If you click on those links, I may get a small commission at no additional cost to you.

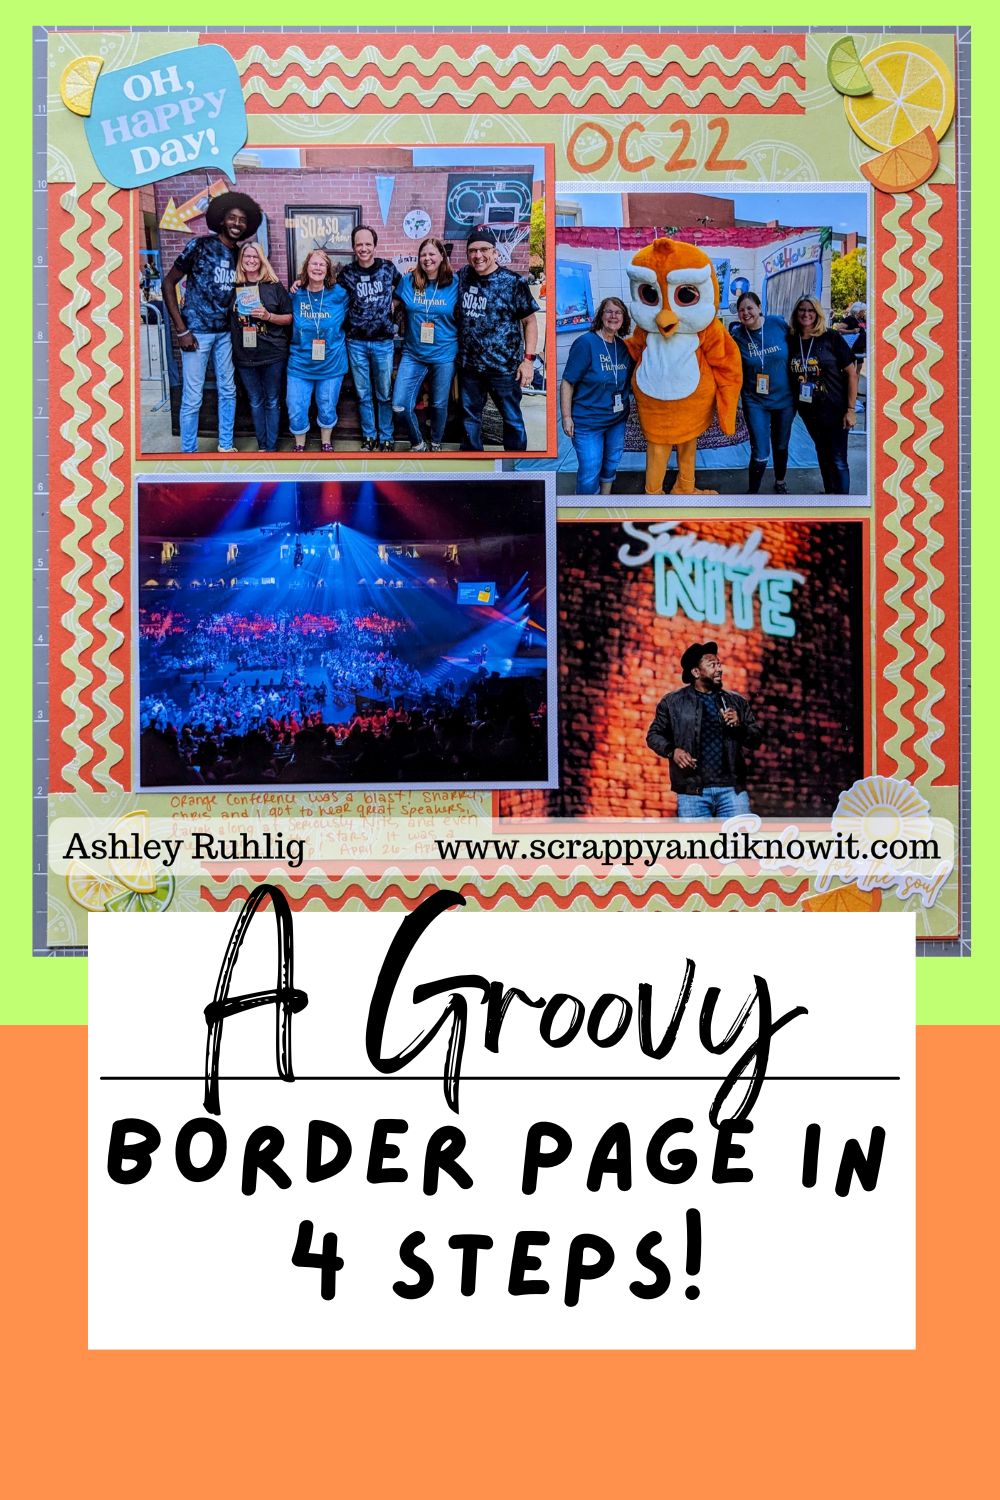
I’m always looking for new and fun ways to use my Border Maker or Border Punches. When I came across a page like this, I had to try it for myself! Here is how you can make a groovy border page in 4 steps.
Tools I Used:

To create this fun page, you will need a Border Maker System and a cartridge that ends up not connected to the page. These are ones that make a chain, verses a design on the edge of a page. In my example, I used the Double Rickrack cartridge. I found the Micro-Tip Scissors helpful as well in tweaking my borders.
I also used the 2023 National Scrapbook Day Collection, but any vibrant collection that go together with your photos will do great here! Just use some coordinating embellishments.
How I Made this Groovy Border Page in 4 Steps:
Step 1 – Pick Your Papers and Tools
The first step to making this groovy border page in 4 steps is probably the hardest for me, and that is picking your papers and the border cartridge/border punch you want to use. If you have photos you want to use for this layout, try to base your choices around the themes/colors/season of those if you need help.
You will definitely want to have coordinating colors of cardstock and embellishments to help bring your layout together. Creative Memories offers many options for collections that go together so well, as well as typically have a coordinating border punch to go along with it.
Step 2 – Punch Your Paper

The next step in making our groovy border page in 4 steps is to punch your paper edges! To do this, you will want to line your paper up on your border maker, like you would if you are just going to punch a border as usual. Once your paper is in and you pull your paper guide back, you will start your punch cartridge at the SECOND notch and end at the second from the last notch. The key here is to NOT punch all the way across.
You will repeat this process on all 4 edges of your paper. With the Double Rickrack cartridge, I had to be very careful pulling the cartridge away from the paper at the end, so I didn’t rip it. So keep that in mind. Once you are done punching all of your edges, you’ve completed this step!
Step 3 – Mat Your Paper and Photos
Next, you will want to mat the paper you just punched the edges of onto a piece of cardstock that coordinates well. To save cardstock, I cut strips to just cover the punched out borders so I could use the center to mat some of my photos.


A very helpful tool for matting your border sections is the repositional tape runner. It allows you to adhere it by only applying the sticky to the narrow areas. Then you can rub the rest off of where you don’t want the sticky. It truly is a must in my tools.
You will also want to mat your photos on coordinating cardstock and arrange those on your page. I used a couple of different colors that went well. Stick them down and on to our final step!
Step 4 – Embellish, Journal & Title!
Finally, we’ll place our finishing touches! For me, that is creating/picking/writing a title, embellishing, and journaling about my photos! Be sure to use coordinating stickers or embellishments to help that page pop, as well as journal with a color that will help bring it all together. Then, you’re done with your groovy border page in 4 steps!
What border will you use? Do you have a favorite border cartridge that you have to have in your stash wherever you go? Let me know in the comments!
I hope you enjoyed this walkthrough of creating a groovy border page in 4 steps.
Check Out My Other Posts!


