*This post contains affiliate links for products that I have used and want to share with you. If you click on those links, I may get a small commission at no additional cost to you.
I spent a morning playing with Creative Memories’ Theme Packs! Specifically I made a couple of 2 page layouts using ONLY what was included in the Theme Pack for my layouts, just to prove how awesome they are for your various page needs. Check out this theme pack layout and how I did it!

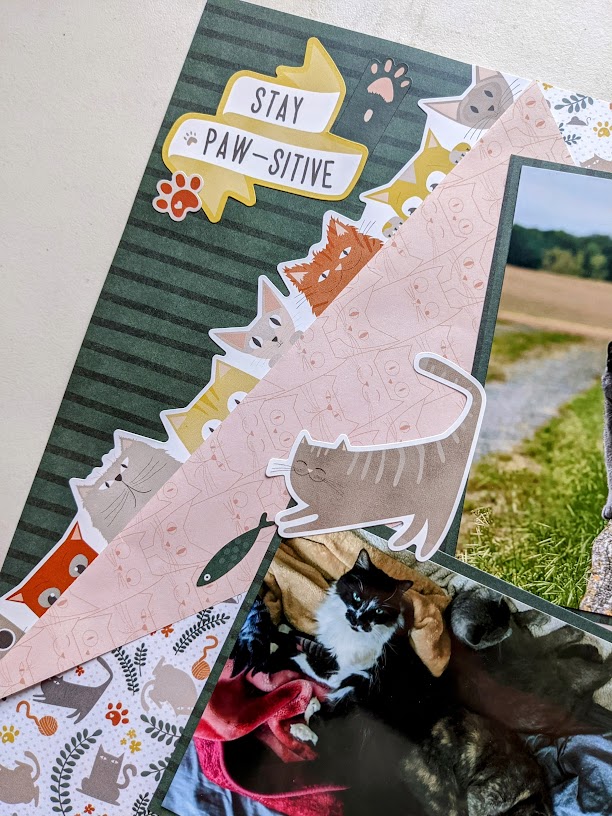
We recently lost 2 of our cats in the farmlands around us and thought they would never come back. Miraculously though, our neighbor, who is the farmer of some of the land found them almost 2 weeks after they went missing in one of their crop dump bins! We are so grateful they are ok, as they are so beloved to our family. Thus, I was inspired to create a couple of pages for them, using the theme pack layout tools from the Cattitude Theme Pack, that is currently available through Creative Memories.
Beginning Your Theme Pack Layout

What I love about Creative Memories’ Theme Packs is that they come with all the elements you need to create a stunning layout! A typical theme pack comes ready to go with a sheet of cardstock, 4 sheets of designer papers, and plenty of stickers to add the final cherry on top of your pages. Creative Memories has different themes to choose from, and switches them out now and then, so be sure to head over to their page and see what they have currently.
The papers and embellishments go together so that all you need to add is a trimmer, adhesive, and a pen for journaling. They truly are convenient ways to get layouts together.
I simply picked out my cat photos that I wanted to use and started arranging the papers in a way that satisfied my eye. With the theme packs, it is so easy to get started.
Putting Your Theme Pack Layout Together

I don’t know about you, but I usually have trouble picking what side of the cute paper I want to use, so I love to use the fold-over technique to display both sides of the paper like I did in this theme pack layout! I am one to save the pretty paper for future use as much as I can too, so I cut the base paper in half to use on the next page and for matting.
The Creative Memories cutting mat is such a great tool for measuring your layout and where you need to cut on your papers. I am horrible at lining things up evenly, so the mat truly helps me to keep things straight and lined up.

I simply folded the top sheet of paper where I wanted the other side to show. Definitely test before you do a crisp fold to be sure it is the look you want. I did the same thing on the next page, but just folded it in the opposite corner.
After adhering the half sheet base to the folded sheet so that it lined up correctly, I adhered the fold down, then matted my photos and stuck them down. From there, I embellished with the cute stickers that came with the theme pack. The border stickers were perfect for the revealed base paper.
To finish up, I journaled a little about our beloved, furry friends, and added the pages to my 2021 book! It was a quick and easy way to check off 2 pages for the album that I love!
Other Theme Pack Layout Examples
I also put together the Puppy Love Theme Pack for our other furry loved one! Unfortunately you can no longer get this theme pack, but Creative Memories may just be putting out another puppy one eventually, so keep your eyes out!


Now is the perfect time to snag the Theme Packs and other awesome Creative Memories products you can use to get those pages together with a Black Friday Deal kicking off Monday! Spend $100 or more on CM products and get exclusive Black Friday Bundles FREE! This is the perfect time to get started or stock up because you can earn SO MUCH free product!

Which Theme Pack could you use for a project right now? Also check out my post about the benefits of scrapbooking! There are so many reasons that scrapbooking is such a great thing and makes great gifts.


3 thoughts on “A Purrfectly Delightful Theme Pack Layout In 30 Minutes”
Comments are closed.