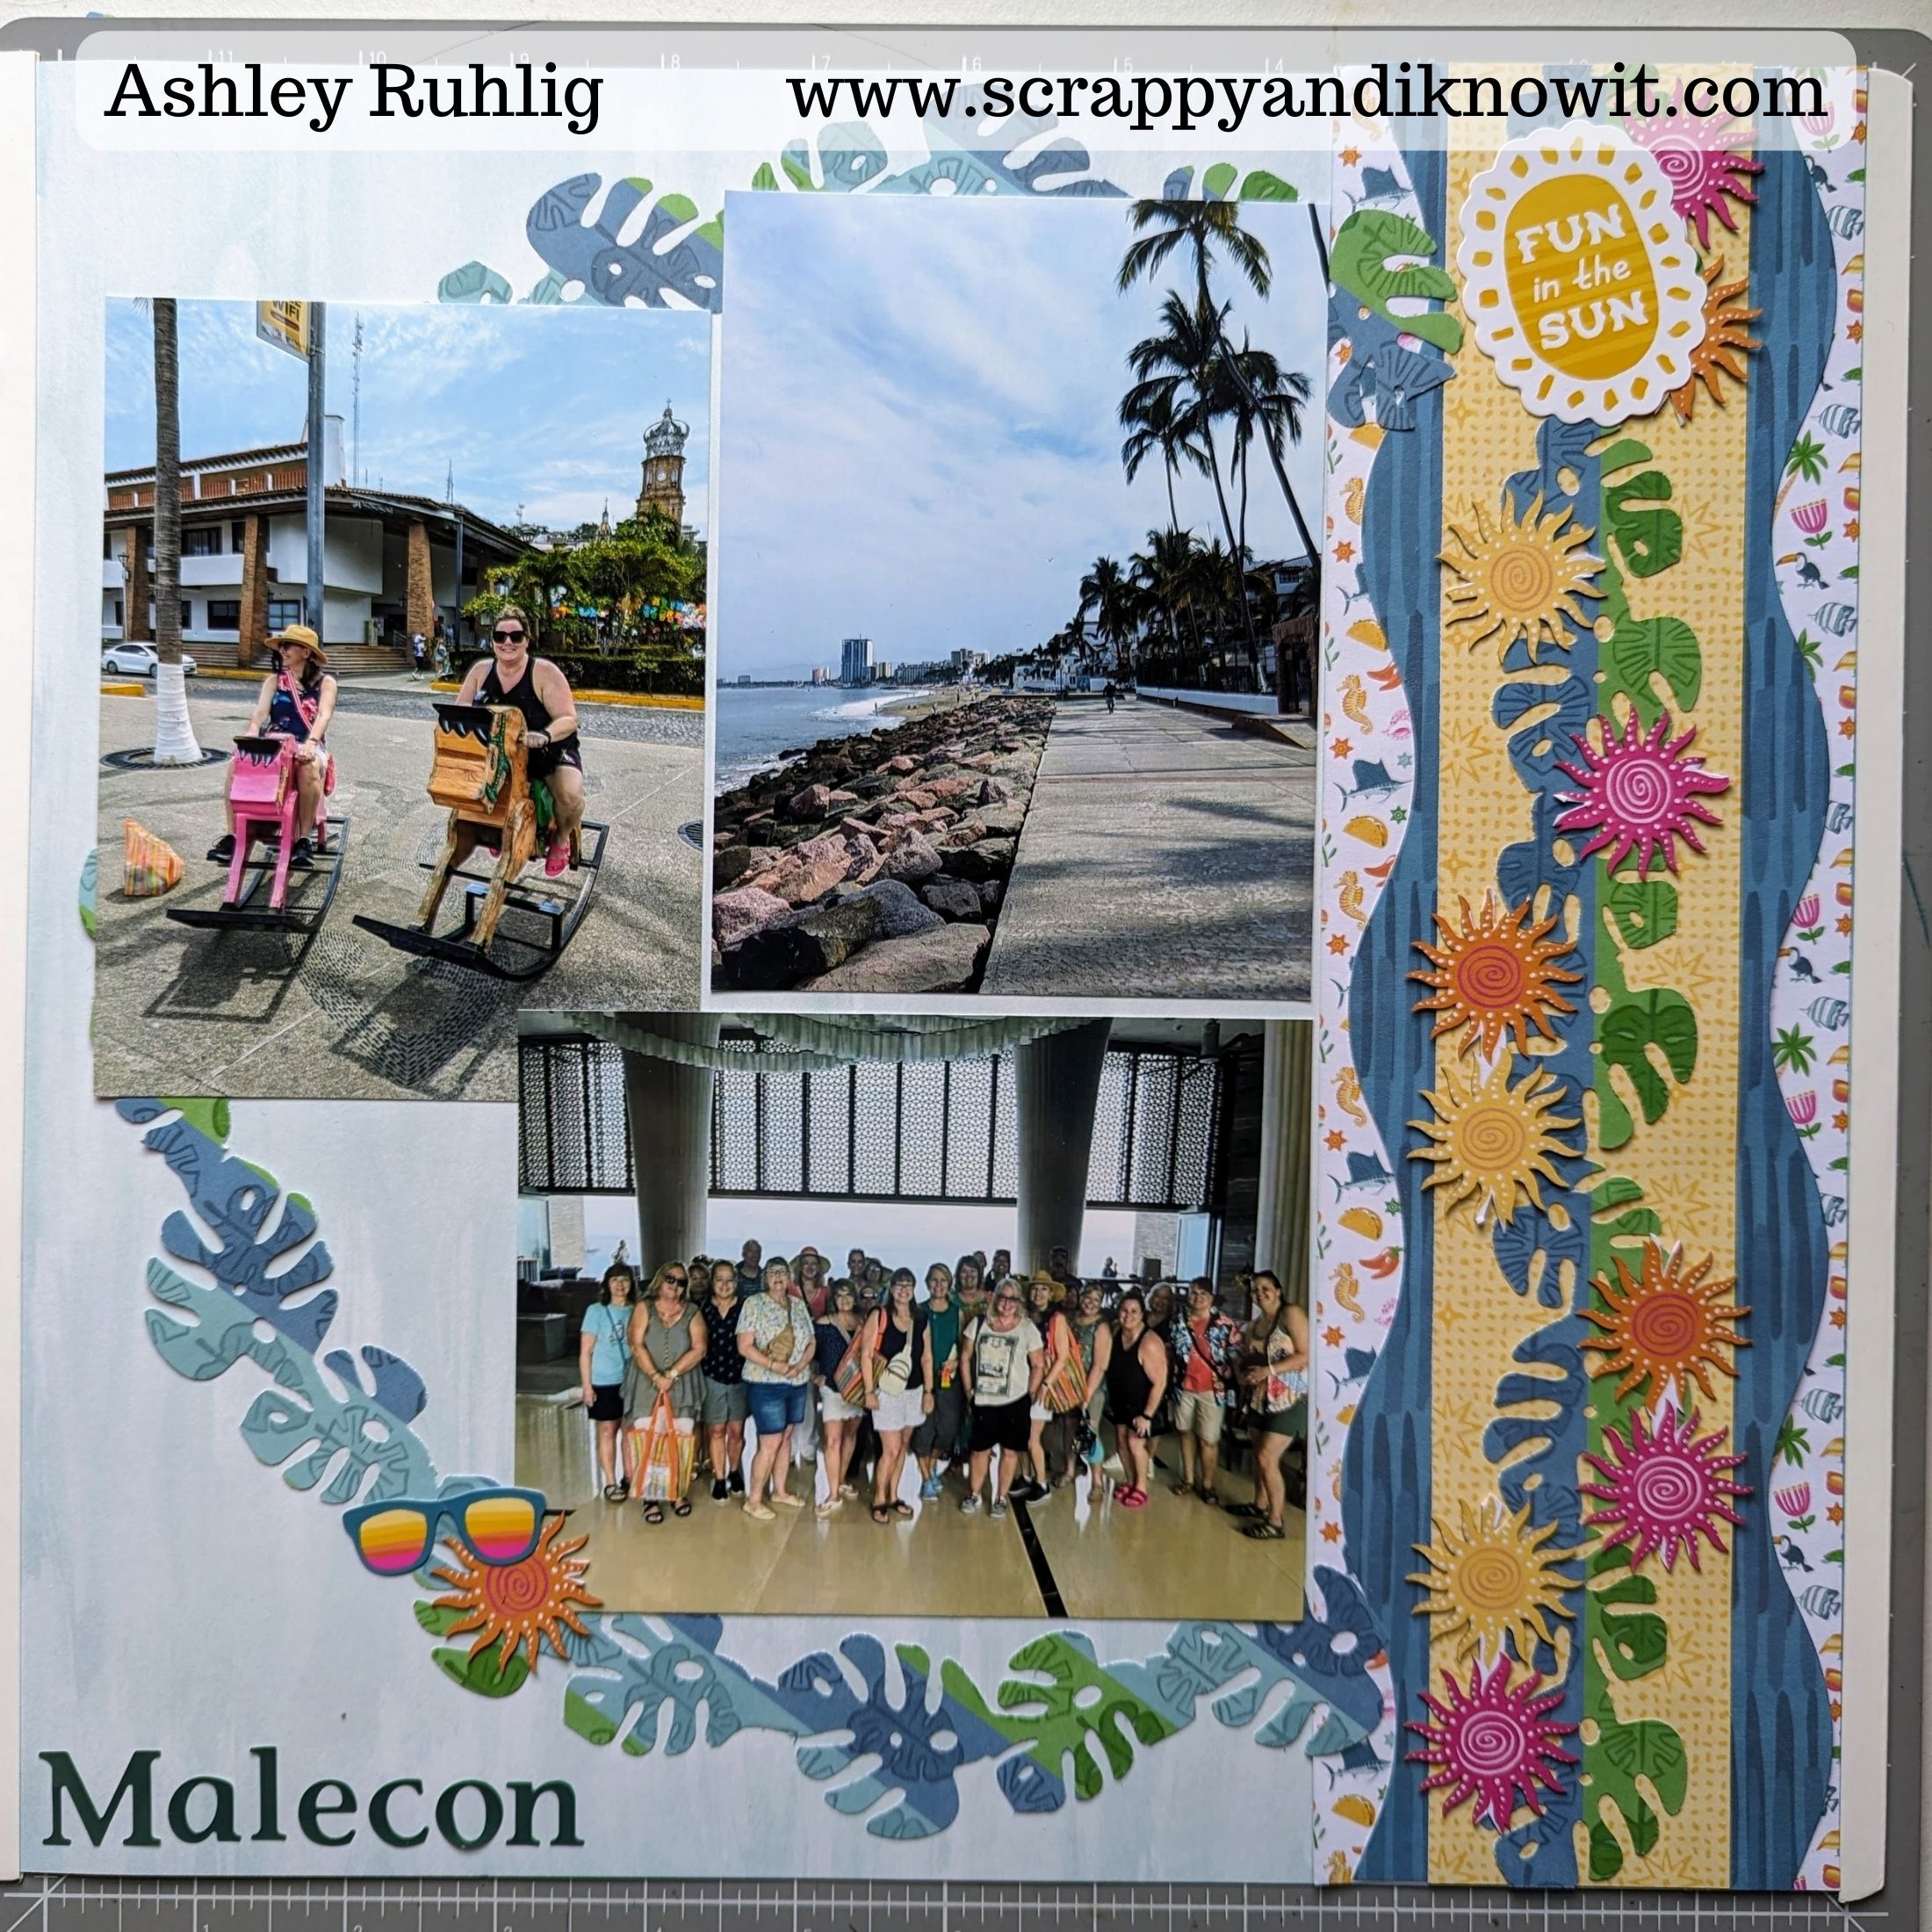
This tropical scrapbook page from one of my fellow scrapbookers, will bring the heat and help you soak up those memories! The best part is that you can create that fun circle without punching in the round, but by merely using pieces of the border you punch out. Check out how I created this tropical scrapbook page here!
What You Need for this Tropical Scrapbook Page
You will need a 12 x 12 base. I used a Serene Waters Fast 2 Fab page as my base, which worked very nicely! Select 3-5 other pieces of paper/cardstock to create the other elements of your page too. Be sure to bring out any coordinating stickers and embellishments too.
For tools, have your 12 inch trimmer ready to go, as well as your adhesives. I found that my Repositional Tape Runner was pretty essential to stick my borders down without much excess to clean up. To create the waves on the border of your tropical scrapbook page, you will need this Decorative Trimmer, which is awesome for so many projects!
You will also need a way to create a decorative border. These border punches are an awesome tool to create with, and there are so many options coming out all the time to fit whatever theme you need.
How this Tropical Scrapbook Page is Created
Begin by punching out 2 borders, using your border punch and the same piece of paper. Set those aside for now and we’ll come back to them.
Cut a strip of paper to 3-1/2″ x 12″ for the border of your tropical scrapbook page. Cut another strip of paper from another piece of paper/cardstock at 2″ x 12″. Using your Decorative Trimmer, cut a wavy strip of paper at 1″ x 12. Then use your 12 inch trimmer to cut the other strip from the leftover edge at 1″ x 12″, so you have 2 strips of paper with a wavy edge and a straight edge.
Adhere your 2 wavy strips to the back of your 2″ x 12″ strip, allowing the wavy edge to show from behind the 2″ strip, similar to what I did in the picture here:

Then adhere those strips on top of your 3-1/2″ x 12″ strip. Finally, adhere the entire piece onto the right side of your base.
Next, using your Repositional Tape Runner, adhere one of your borders previously punched out down the center of your border.
Next, you will use the other border you punched out to create the circular border around your page. You could also create this effect by punching out the border in the round, which you can watch here. Otherwise, you can create this same look by using pieces between your photos. You can do this by setting your photos on the page the way you would like them, then placing the pieces in the gaps to make the circle look.
Once you set it all out, adhere down your pieces with the Repositional Tape, then place your photos. I didn’t mat my photos, but you can if you want to.
I added my title using ABC stickers. Finish up by embellishing and journaling.
Wrap Up
I hope you enjoy making this tropical scrapbook page! You can use it for all sorts of themes and photos. Be sure to download the printable instruction sheet below so you can have it for later.
If you want to check out more of my favorite scrapbooking products and tools, you can see them at the button below at my site!
I also work for an awesome scrapbooking company that has endless perks and no quotas! If you are looking for your own side gig or a way to make commission back on your scrapbook product purchases, this may be an option for you. Check out more at the button below.
Printable Instructions
More Tips and Layouts
*This post contains affiliate links for products that I have used, loved, and want to share with you. If you click on those links, I may get a small commission at no additional cost to you.


