*This post contains affiliate links for products that I have used, loved, and want to share with you. If you click on those links, I may get a small commission at no additional cost to you.

We have talked a little bit in an earlier post this month about getting our supplies in order and organized, but today I want to break down even further how I keep my scrapbooking supplies, specifically my papers, coordinating stickers, and embellishments all together and organized. Here are 4 ways you can keep your scrapbooking supplies organized.
Sort Your Scrapbooking Supplies by Themes

Start by creating a system and deciding your themes. This will depend on what you scrapbook and use the most. For instance, I have a daughter, but no boys, so I don’t have a “boys” theme, but mostly themes like “dance,” “pink,” “sparkly,” etc. You get the point. But you probably have Christmas papers, embellishments, and stickers. You probably have summer themes. You will want to decide your themes based on what you use and what scrapbooking supplies and collections you have already.
Think about it how you would when you go to scrapbook a page. When you have your photos in front of you, and you are getting ready to decide the papers for it, how does your brain think? Do you base it on colors in the photo? Do you decide by what is happening in the photo? Do you pick your scrapbooking supplies based on the season or holiday it was at the time?
This process of deciding my themes has been a dynamic, on-going one for me. It isn’t something you have to set permanently. Give yourself the flexibility to decide as you go and as life’s seasons change for you. I had so many scrapbooking supplies for baby stuff when my daughter was 3 and under, it was madness. Now, I have none and have given it away to other moms. Now, I have lots of school and dance.
Put Your Themes into Power Project Folders

Once you have your scrapbooking supplies sorted by theme, put each of those into their own sleeve or Power Project Folder. Creative Memories just launched these awesome Power Simple Pockets, that I will definitely be getting my hands on. I especially love the Power Project Folders, however, because of all of the extra pockets for additional embellishments. Leave any collections together in their packaging, if you wish. I even put the stickers and embellishments in with their coordinating paper so it is all together.
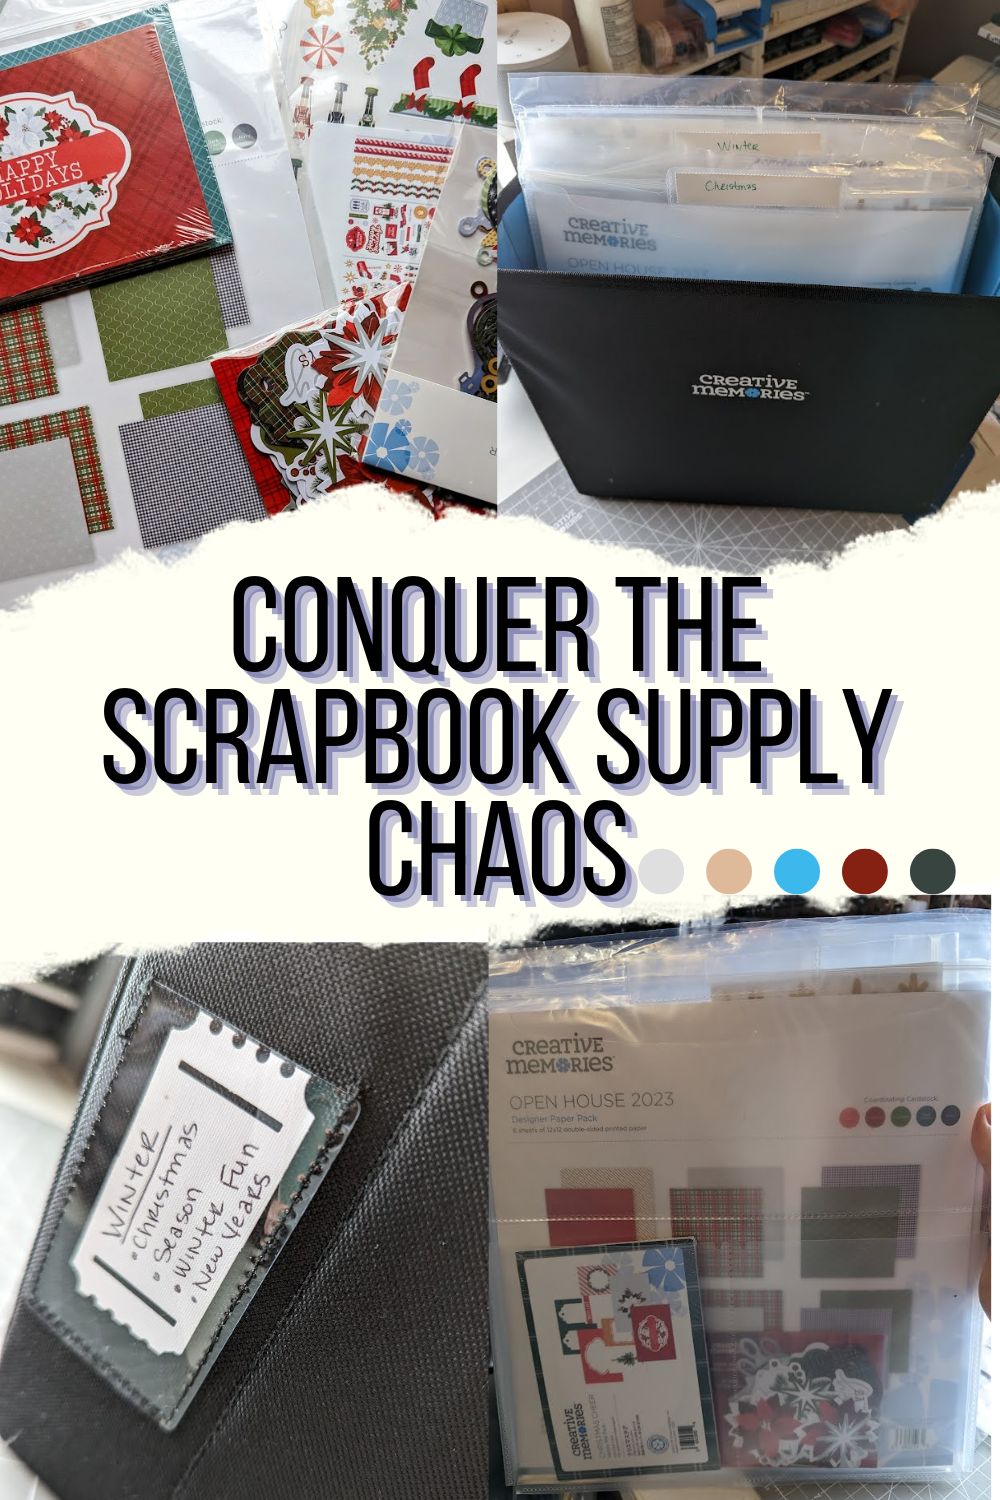
For instance, I have “Christmas” as a theme, but I have a ton of Christmas scrapbooking supplies. With this being the case, I keep all of my Christmas collections in their original packs. Example here of keeping Christmas Cheer in its pack, and the Christmas Open House in its separate pack.

Then, I slip any coordinating stickers and embellishments in the same pack with its coordinating paper. So, I put the coordinating stickers and embellishments for Christmas Cheer in the pack with the Christmas Cheer paper. This is so that all of the coordinating scrapbooking supplies are together when I pull out that collection to use. I don’t have to go digging through all of my papers, then all of my stickers, then all of my embellishments to get everything I need for a layout.
Mats I tend to keep in their own container or in a different pocket of the Power Project Folder because those make the folders very thick. Plus, I don’t have too many mats that it is hard to dig through to find what I need. Stickers and paper are a different story.
So, to break it down more, I put all collections together with their paper. So for the theme of Christmas, I may have Christmas Cheer, Seasonal Sightings, Merry Little Christmas, Holiday Open House…but I leave each of those collection’s stickers and embellishments in with their paper.
Then, I take those collections and put them all together in their Christmas theme Power Project Folder. If there are too many, I simply add another folder and label it “Christmas – 2”.
As I said, this is just what I do, and it works for me. Certainly do what works for you and your scrapbooking supplies though!
Categorize Your Themes into Bigger Groups

This brings me to my next point – once you have your scrapbooking supplies sorted by themes, start compiling those into categories. This would be something like taking all of your beach, camping, pool party, and BBQ themes and putting them together into a “Summer” category.
Practical Examples
Category – Themes
Spring – with themes of: Easter, Birthday (all of our birthdays are in the spring), flowers, etc.
Summer – with themes of: Beach, BBQ, 4th of July/Patriotic, Camping, etc.
Fall -with themes of: Halloween, Leaves, Thanksgiving, etc.
Winter -with themes of: Christmas, Snow, etc.
Everyday Life – with themes of: Family, At Home, other generic collections that I have
Kids – with themes of: School, Dance, Play, Pandas (her favorite), etc.
Travel – with themes of: Disney, Amusement, Zoo, Road Trip, etc.
Tonals – which include general collections with color hues, Totally Tonals by Creative Memories
Put Your Power Project Folders into POD Inserts

Finally, we will be taking those category piles and putting them into a greater storage POD. I love these POD Inserts for keeping my collections and themes together and easy to find! I’m slowing building up my stash of these and getting my stuff organized and less overwhelming.
For instance, I take a POD Insert, then label it with the category it is going to hold. In this case, “Winter.” I then put all of my theme folders in that POD Insert that would fall under the category of “Winter,” like Christmas, Snow, Winter fun, Etc. You can even write “Winter” on the tag of the POD Insert, then put the themes below it, so you know for sure what is in that POD.

These PODs store nicely on a shelf or within their bigger Large POD Tote, or even in the Storage and Display Organizer. Note that the tabs of your Power Project Folders will be bent over in the Large POD Tote if you close it. If you want to skip the POD Insert for your categories, you could just use a Storage and Display Tote, which is larger, but could also hold a lot if you combine your categories or have a lot of scrapbook supplies for your categories. The POD Inserts just make it lighter to deal with with when you want to haul it somewhere.
Fun fact: The new Ticket Border Punch has the perfect sized tickets to fit in your POD Insert label spot.
Breaking It Down
So, to review, here are my steps for getting organizing my scrapbooking supplies (papers, stickers, embellishments):
- Sort your supplies into themes, keeping collections together
- Put those themes into Power Project Folders or sleeves
- Sort those folders/themes into categories
- Put those folders, grouped into their categories, into a POD Insert or Storage and Display Tote
And of course, label, label, label! Make sure you are labeling your folders and totes.
I hope you found this helpful! Let me know how you get organized with the piles of scrapbooking supplies!
Check out more tips and layouts!


3 thoughts on “How to Conquer the Chaos of Your Scrapbooking Supplies in 4 Steps”
Comments are closed.