*This post contains affiliate links for products that I have used, loved, and want to share with you for your scrapbook layout. If you click on those links, I may get a small commission at no additional cost to you.

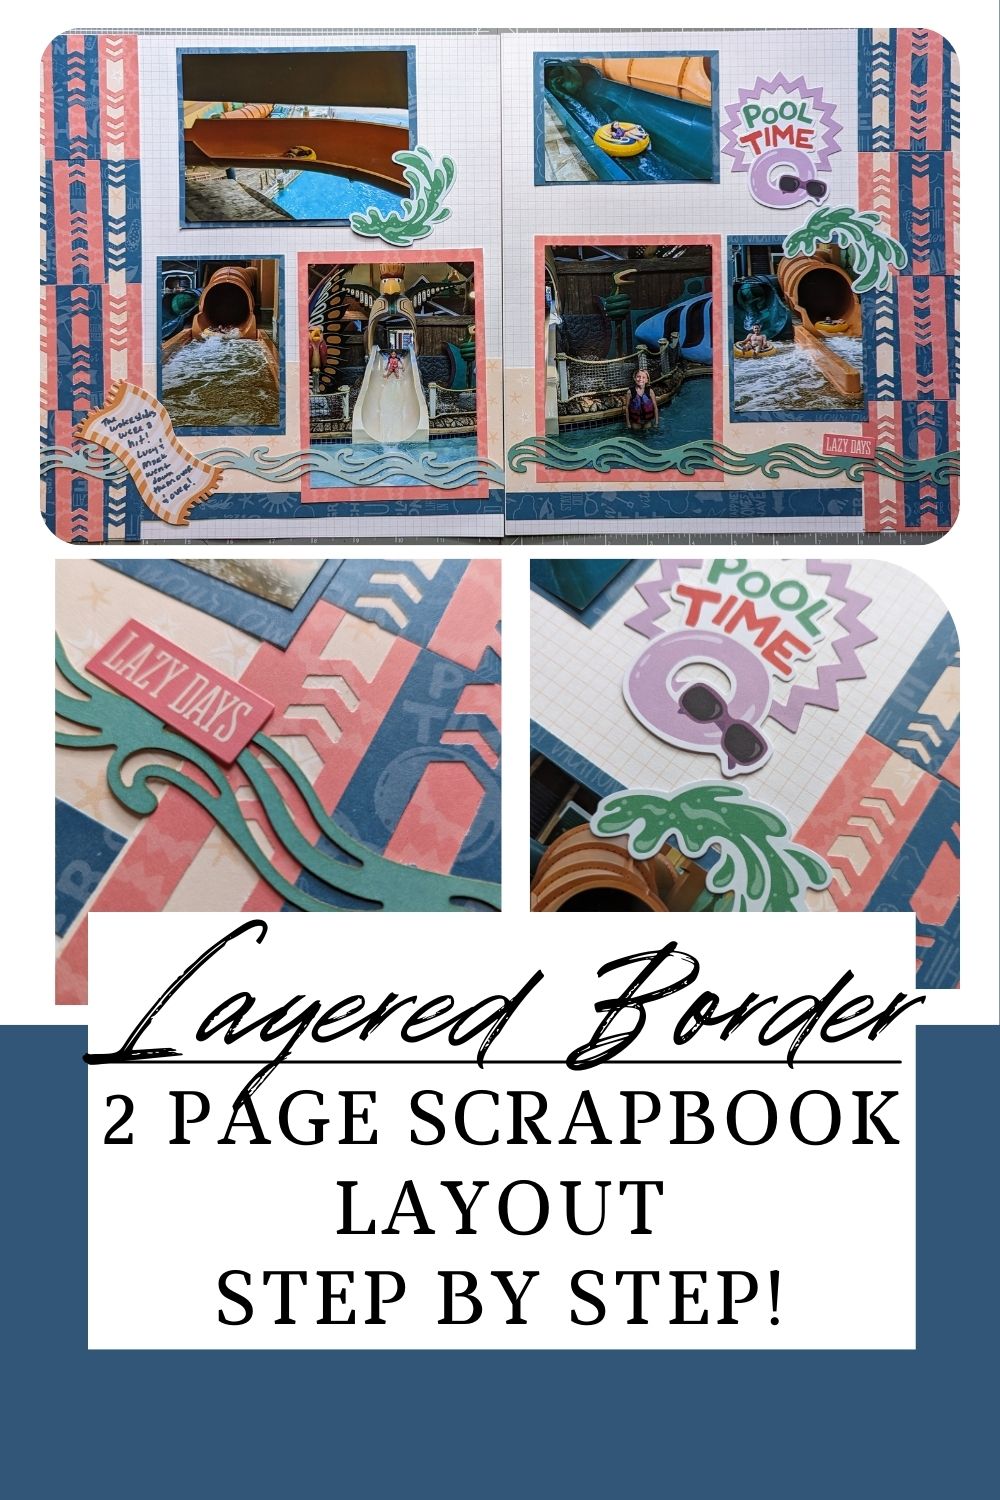
I used a Creative Memories Project Recipe to create this fun, layered border on a 2-page layout. It looks daunting, but it actually isn’t bad to make at all! Let’s create this layout together for our 3rd challenge in the Scrappy January Virtual Crop. You can submit your layout in my Facebook group on the challenge post by Thursday, February 1 at 11:59pm for your chance to win a prize. Either way, you’ll get a cool layout to add to your book.
What is needed for this layered border layout?

You will need 5 sheets of paper, or a mix of paper and cardstock. 2 of those will be your base. I picked a couple of muted tones from the Creative Memories Feeling Bright paper pack to be the foundation of my pages. I used the Sweet Summer collection for the rest.
You will also want to select a border punch or cartridge that stays connected to your paper, meaning that it isn’t a chain that falls from your main paper when you are done punching it out. I used the Chevron Arrows Border Maker Cartridge for mine, using the Border Maker System.
Also very handy in creating this was the Repositional Tape Runner. It helped to stick down the delicate border pieces and gave me room to move them around if I needed to. For the rest, Regular Tape Runner works just fine!
How do I make the layered border layout?
You will simply follow the instructions and cutting guide on the directions, which you can download below! You will start by punching out your border on the 1st sheet of paper you choose. Then, cut it from the sheet, and cut it at every 3 inches.

You will continue with cutting each sheet, according to the guide, until you have all 3 done. You will then layer the border pieces onto the bottom piece that you cut from your 3rd paper, creating a neat looking border on each side of your layout.
From your cuts on the guide, you will also get your mats for your photos and the decorative strips along the bottom of the pages. I did adapt my mats a little to fit the smaller pictures I had, and it worked very well. Feel free to adapt your page to what works for your photos and theme.
For more in depth instructions, please refer to the video and to the downloadable instructions at the bottom of this post.
I used the laser cut embellishments and stickers from the Sweet Summer collection. They were perfect for this waterpark themed layout!
Stay tuned for more challenges in this weekend’s Scrappy Virtual Crop as I will be posting more sets of instructions and blogs to get you going full speed, and be sure to check out what has already been posted. Remember to share your layout in my Facebook Group for a chance to earn prizes by Thursday, February 1st at 11:59pm. Request to join if you are not on there yet. We have a lot of fun, weekly challenges, prizes, events, and deals!
And, remember to download the instructions for this layered border layout below and save them for future reference, or use them as you build your page now. Good luck and have fun with this scrapbook layout!
Check out the video walk through here:
Download instructions here:
Check out these other tips and layouts!


