
Check out how I created this outdoorsy scrapbook page! When it comes to scraps and the stash, it seems that I have tons for camping and hiking. That is why I thought this layout from the Creative Memories blog would be a perfect one to use up my stash in that theme.
What You Need for this Outdoorsy Scrapbook Page
Pick a base to start. This will be a 12×12 sheet of paper and it will show underneath where your photos go on this layout. You will attach the scraps and side piece to this base.

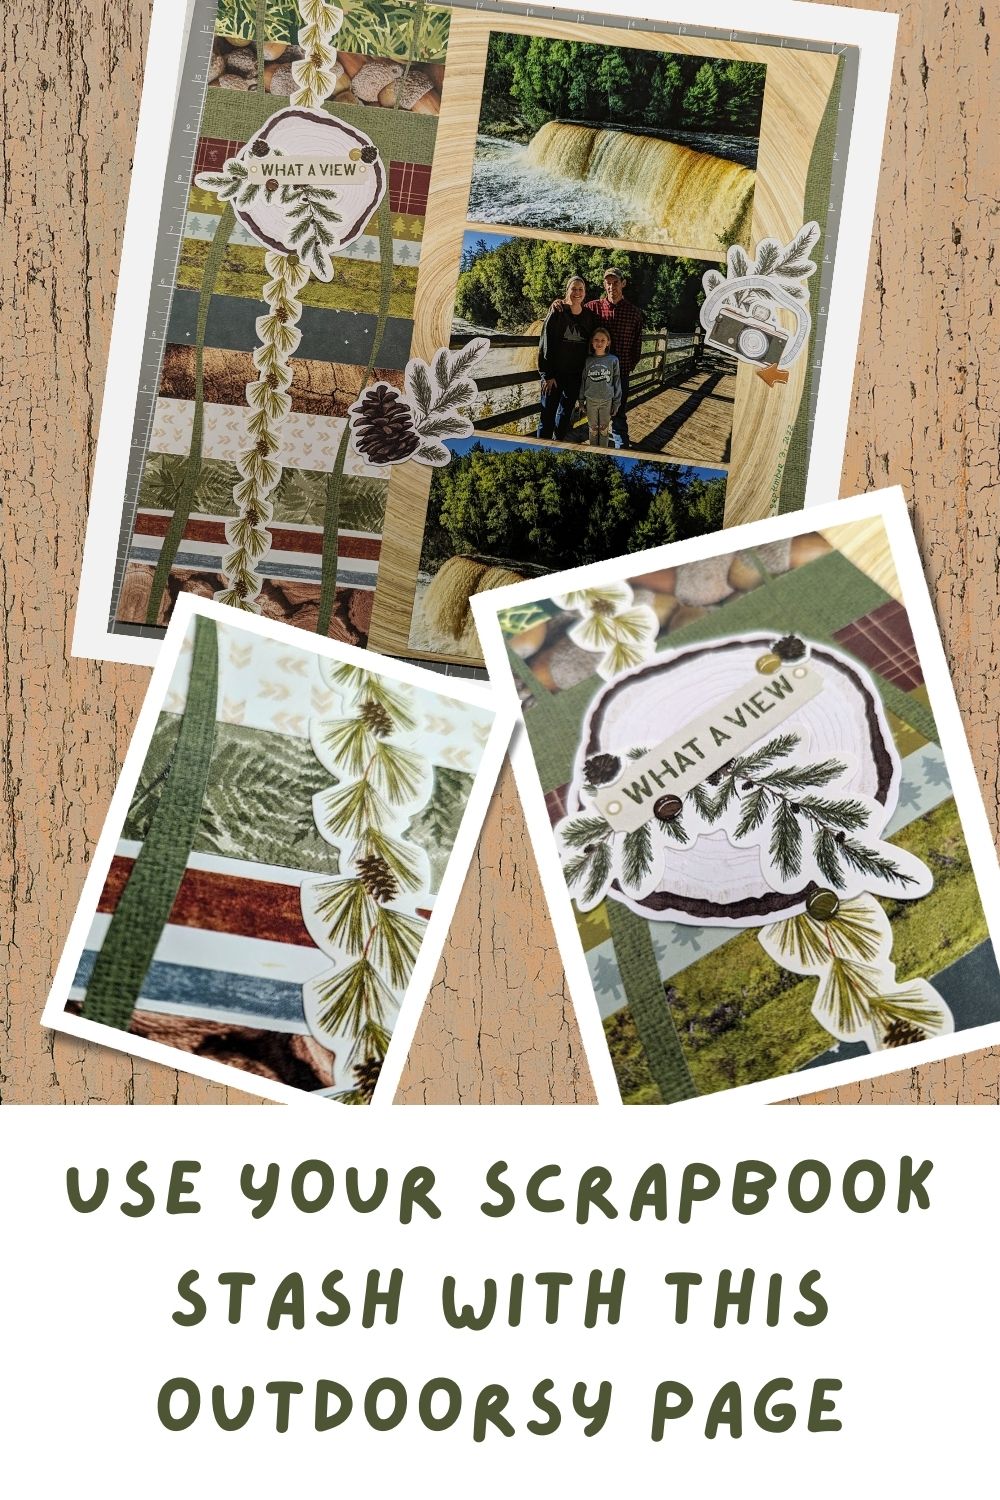
You will also want to have many options for your papers to create your scraps. I had a ton of smaller pieces in my outdoorsy collection, so this outdoorsy scrapbook page was perfect for this sketch. You will want to make sure you can make 12 pieces at 4-1/2″ x 1″.
I used a variety of camping and outdoors collections from Creative Memories, including Set Up Camp, Happy Camper, and others, along with stickers and embellishments from those.
For tools, you’ll need a 12 inch trimmer, adhesives, and the 12 Inch Decorative Trimmer for your waves.
How to Make it:

Start by cutting up your 12 pieces at 4-1/2″ x 1″ each. Use several different designs that go together so you have a nice variety.
Lay them out on the left side of your base paper so you have them how you like them, then stick them down with Repositional Adhesive once you’re ready.
Trim a piece for the right side of your layout at 1/2″ x 12″ and adhere it along the right edge of your base. I used a wavy edge for my strip, but you can do what you want to do with your layout.
With your Decorative Trimmer, create two narrow, wavy strips for your left border. Adhere them to both sides of your border sticker, as shown in the example. Your strips should be about 1/2″ x 12″.

Add a border sticker, embellishment, or punched border down the middle of your stacked pieces. Add an embellishment cluster and title towards the top, center of your border sticker.
In my example, I did not mat my photos because I think they popped well enough off of my base, but if you want to mat them, you can. I take mat sizes lightly and simply adhere my photos to the paper I am using for my mats, then trim them from there. I’m not always a precise measurer. The mat sizes are in the sketch though, so feel free to go by those if you would like!
Embellish your page with other embellishments and stickers. Feel free to decorate it with some punches too! Wrap it up by journaling about what is going on in the pictures of your page. Explain it so someone would know without you needing to be there to explain it.
Wrapping Up
I hope this layout helps you use up your stash and scraps! Whether you create an outdoorsy scrapbook page, a Christmas theme, a summer theme, etc., it is bound to look awesome! Remember to download a printable instruction sheet for this layout below so you can keep it for later.
If you don’t already have a Creative Memories Advisor and want to check out their unique, and exceptional products, feel free to peruse my site at the button below!
Download Instructions
More tips and layouts!


*This post contains affiliate links for products that I have used, loved, and want to share with you. If you click on those links, I may get a small commission at no additional cost to you.

