
This foodie scrapbook page is from a Creative Memories layout that I go back to again and again for different themes! I love how it uses mats and layers to really create a page that pops in not much effort at all. Come with me as we create this page this week!
What You Need to Create This Foodie Scrapbook Page
To create this foodie scrapbook page, or whatever themed page you are aiming for, select a variety of designer papers and coordinating cardstock to piece it together with.

You will want your 12 inch trimmer, adhesives, and any other basic tools you use to scrapbook with. I like to have my 13×13 Cutting Mat sitting under my page to help with measuring and lining elements up evenly with every page I create.
There are borders in the center of this foodie scrapbook page, so you will want a way to create those, with a Border Maker System, Border Punches, and/or border stickers. I truly love my Border Maker System, as you can acquire many different cartridges for it to make various borders.
Have some coordinating stickers and embellishments handy to bring your layout together as well!
How To Create This Foodie Scrapbook Page

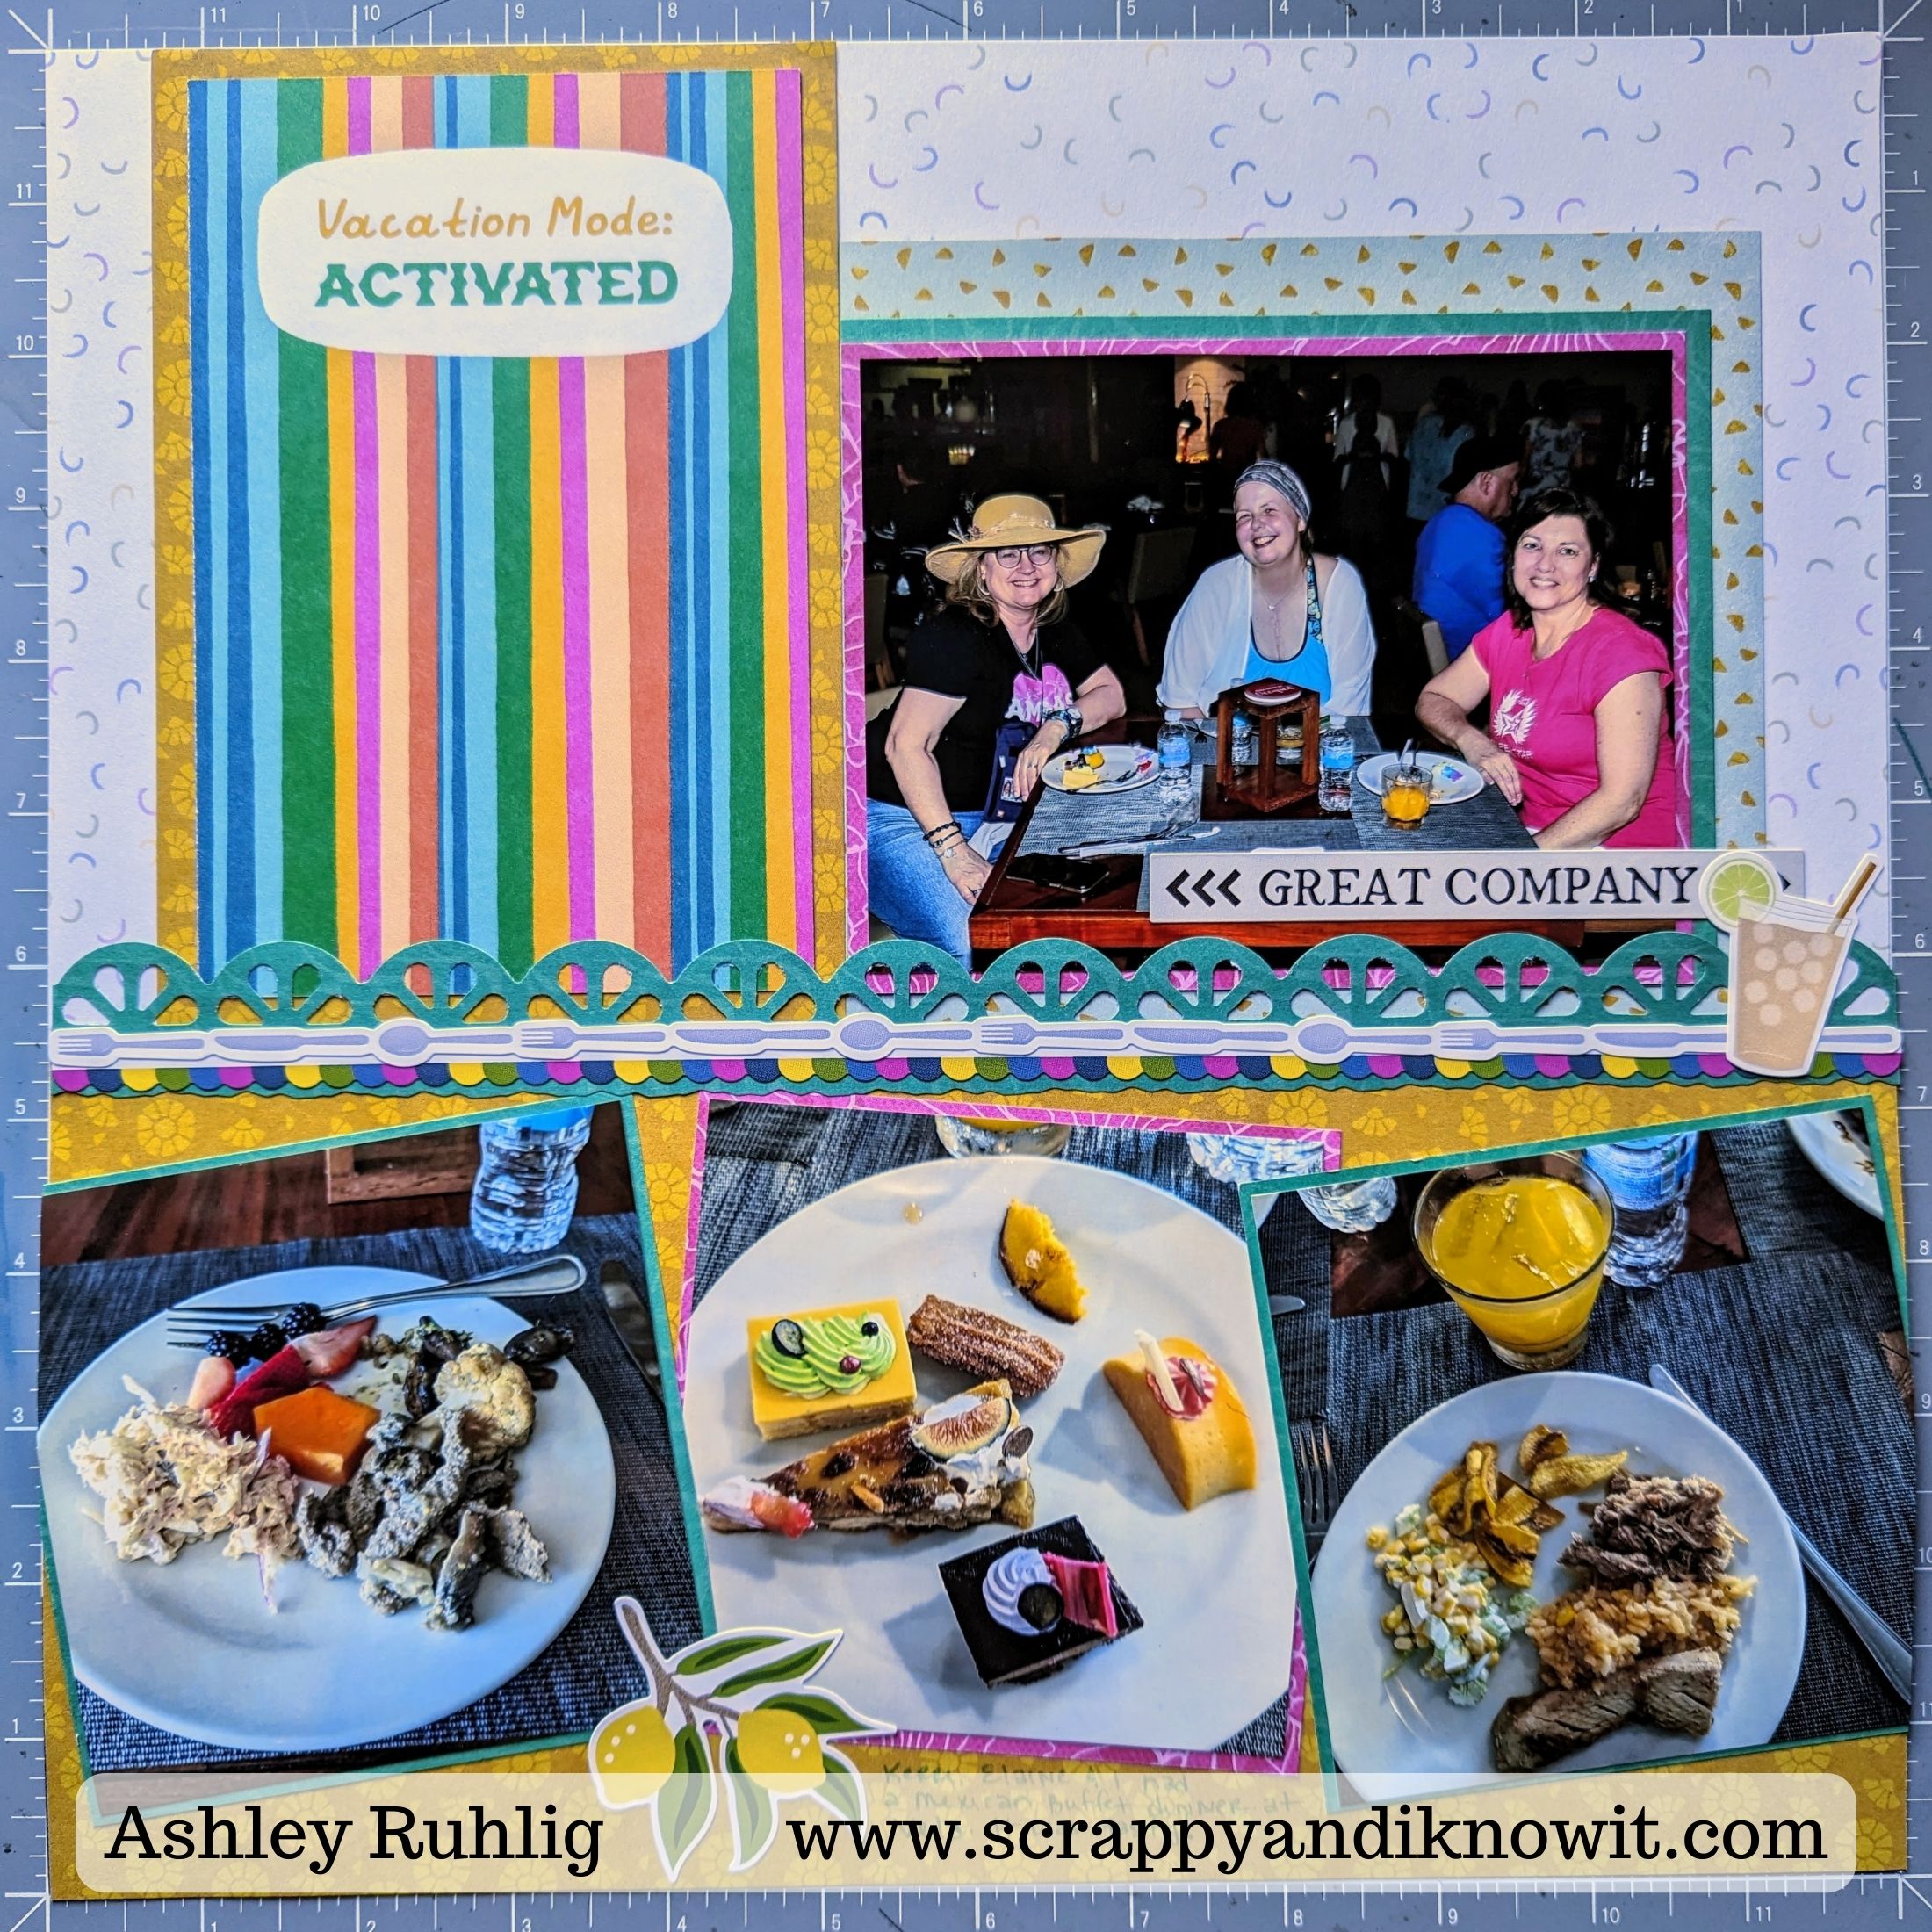
Begin with a 12″ x 12″ base. It will show at the bottom of your layout. You will select another piece of paper for your top base and trim it to 12″ x 6″. Adhere it to the top half of your base.
Select a 4″ x 6″ mat from one of your Variety Mat Packs. You can select one with a title or add your own title. Adhere your mat to a piece of paper at 4-1/2″ x 6-1/2″ and stick them both to the top, left side of your layout.
Next, use your other various designer papers and trim a variety of pieces from them. Trim a piece to 6″ x 5-1/4″, another to 5-1/2″ x 4-3/4″, and a photo to 4-1/2″ x 3-3/4″. Mat the photo on another piece sized 4-3/4″ x 4″. Adhere them all layered as shown to the top, right of your base.
Trim 3 more photos to 4″ x 4″ and adhere each of them to 4-1/4″ x 4-1/4″ mats and adhere along the bottom of your layout.
Next add borders along the center of your foodie scrapbook page. You can use the Border Maker System, Border Punches, and/or border stickers. Layer them up so you have a nice center that helps pop your page!
Finally, embellish and journal as desired.
Wrap Up
I hope you enjoy creating this foodie scrapbook page for any theme! I have used this layout idea for many different themes as it can easily be tailored to whatever photos you are looking to get in your scrapbook. You can also print a downloadable guide below.
If you don’t already have a Creative Memories Advisor, I would love to be yours! You can shop my site at the button below. I love being an Advisor, and highly recommend becoming one if you are looking for a stress-free side gig! No quotas or minimums. Lots of product previews. A great community of support, and so much more! You can read more about all of the amazing perks of being a CM Advisor at the button below as well.
Download Instructions
More Tips and Layouts


*This post contains affiliate links for products that I have used, loved, and want to share with you. If you click on those links, I may get a small commission at no additional cost to you.


One thought on “A Fabulous Foodie Scrapbook Page with 4 Photos”
Comments are closed.