
*This post contains affiliate links for products that I have used, loved, and want to share with you. If you click on those links, I may get a small commission at no additional cost to you.
We are continuing on with our Scrappy Virtual Crop with Challenge 2 and this well-rounded scrapbook page! Be sure to follow along with the January Virtual Crop on my Facebook Page. Enter a photo of your layouts in the comments of the challenge posts for a chance to win prizes by Thursday, February 1st at 11:59pm!
What is Needed to Create this Rounded Scrapbook Page?
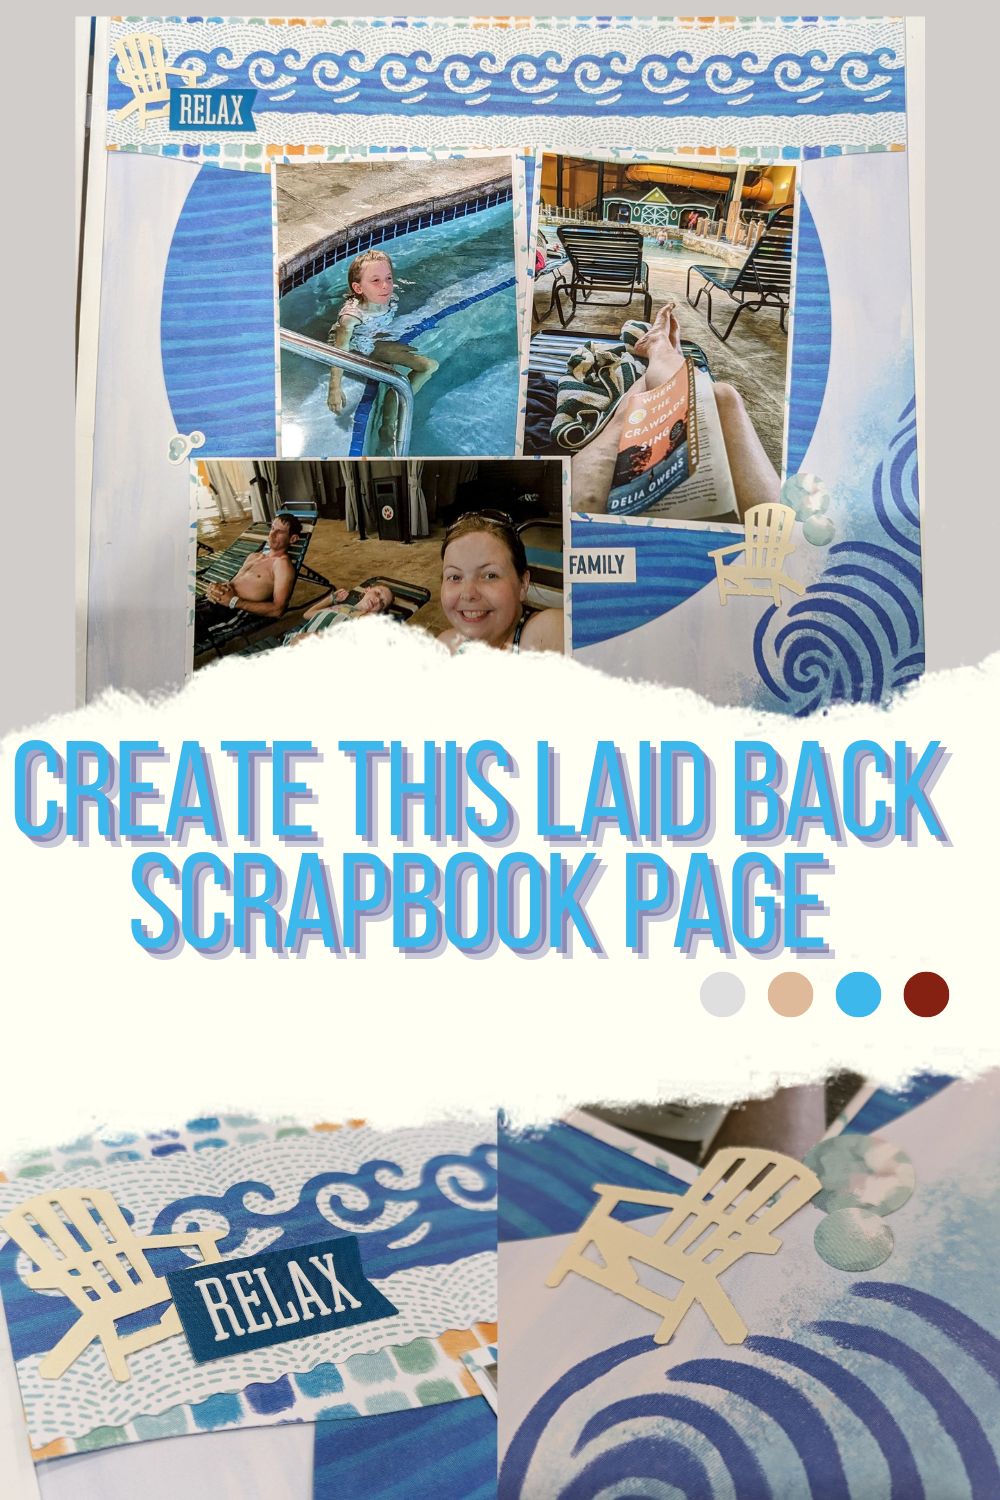
I created this fun page on a Serene Waters Fast to Fabulous (Fast2Fab) page, as I am working on getting our vacation book done, and it is in a Fast2Fab Album. I haven’t used them much, but this experience with them has really opened me up to using this easy albums in the future! The base page for this layout worked very well, so I decided to use it, rather than cover it.

You will also want to have your Circle Cutter, or the Custom Cutting System and Jumbo Circle Pattern by Creative Memories to create your circle. The sizes will vary, depending on what you are using, so if you’re circle isn’t 10 inches because you are using the system, don’t fret! You can adapt your layout, no problem! You will also need your cutting mat.
To create my top border, I went away from the instructions just a smidge and did a wave border from the Border Maker System and cartridge, as well as outlined the overall border with a wavy bottom layer, using the Decorative Trimmer. You have to have waves everywhere when creating a page from the waterpark!

I also took advantage of my Adirondack Chair punch and used that to help in the embellishment process. Unfortunately, this punch was very limited and is no longer available, but you can use any punch and embellishments that will go with your theme for your rounded scrapbook page.
How To Make This Rounded Scrapbook Page
Begin with a 12×12 base of your choosing. As I said before, I used the Fast2Fab page that I already had going in my book because it worked so well.
Select another 12×12 paper, or cardstock color that you want to use for your circle. Place that paper on your cutting mat.

If you are using the Circle Cutter, set the size to 10″, center your cutter in the middle of your paper and give it a test spin to make sure it won’t go off the page before cutting. Then, cut out your circle.
If you are using the Custom Cutting System, center your Jumbo Circle Pattern on the paper you are using and decide if you want to go bigger than the 10″ or smaller. If you want to go smaller, use your Red Blade in the inner track of your pattern to create an 8 and 3/4″ circle, or you can use your Red Blade on the outer edge of your Jumbo Circle to create an 11 and 1/8″ circle. It is up to you!
Once you have created your circle, adhere it to the center of your base page.

To create your border as I did it with the waves, cut a strip of paper with your decorative trimmer at 12 x 2″. (Note that I did mine in two pieces, so it may look wider in the picture. You can do this as well!) Then, cut another strip at 12″ x 1 and 1/2″. Then, I created a border with my Border Maker system and the Elemental cartridge to make my 12″ x 1″ top border. You could create a border like this, or use a border sticker for your top layer as well.
Put all of your layers together, then adhere your border towards the top of your page.
Trim and mat your photos as you want them to fit, and stick them to your page too. Embellish and journal!
Be sure to download the instructions for your stash below and post your completed layout on my Facebook group by February 1 at 11:59pm to possibly earn a prize!
Download Printable Instructions
Check out these other tips and layouts!


